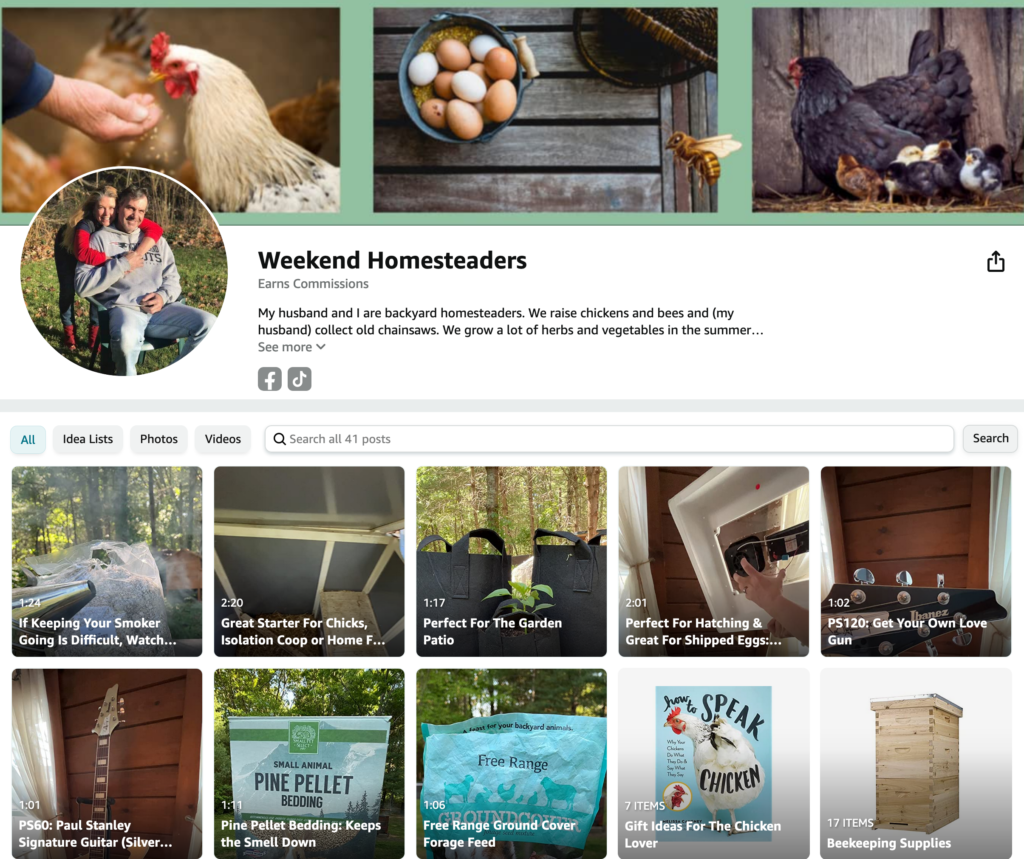
Balancing Corporate & Homesteading Lifestyles
👑 The Emergency Queen: When the Hive Chooses a New Leader
In the fascinating, organized chaos of a beehive, nothing is left to chance — not even leadership transitions. When a queen bee dies unexpectedly, goes missing, or fails to perform, the hive doesn’t fall apart in despair. Instead, it launches into emergency mode to raise a new queen — fast. This is when the hive creates what beekeepers call an emergency queen.
🐝 What Is an Emergency Queen?
An emergency queen is a new queen raised by worker bees in response to a sudden queen loss. Unlike a planned succession (known as supersedure), emergency queen rearing happens with no advance notice. The moment the queen disappears, her pheromone signature fades — and the workers know almost immediately that she’s gone.
With no queen to lay fertilized eggs, the colony’s future is at risk. So the workers act quickly and instinctively, selecting a few very young larvae (less than 3 days old) from existing brood cells. They begin feeding these larvae large amounts of royal jelly, a protein-rich secretion that triggers queen development. Then, they reshape the existing worker cells into larger, peanut-shaped emergency queen cells to accommodate the growing queen larva.
⏳ Timing Is Everything
From egg to emergence, a queen bee develops in just 16 days — faster than workers or drones. But with an emergency queen, the process is even more delicate:
- If larvae are too old, the resulting queen may be weak or poorly developed.
- If there are no larvae young enough, the hive can’t raise a queen at all and becomes hopelessly queenless.
That’s why many beekeepers leave a frame of eggs or very young brood when they suspect a hive may go queenless — it gives the colony a chance to raise an emergency queen.
🐝 Signs Your Hive Is Raising an Emergency Queen
If you open your hive and see:
- Multiple queen cells, often found on the face or edge of frames
- Cells that look like peanuts and were built onto existing brood comb
- A sudden absence of eggs or fresh brood
- Workers acting restless or defensive
You may be witnessing an emergency queen process in action. At this point, it’s best to let the bees do their work — introducing a new queen yourself could result in her being rejected or killed.
⚖️ Emergency Queens vs. Supersedure Queens
While both types of queens are raised by the colony, there are some key differences:
| Type | Trigger | Timing | Quality Potential |
|---|---|---|---|
| Emergency Queen | Sudden loss or death of queen | Reactive | Often rushed, can be lower quality |
| Supersedure Queen | Failing or aging queen | Planned | Usually higher quality and accepted smoothly |
What Is Tallow?

Tallow is a form of rendered animal fat, most commonly made from beef suet (the dense fat around a cow’s kidneys). Once rendered, it becomes a stable, shelf-friendly fat with a creamy texture and a long history of use in cooking, skincare, soapmaking, and even candlecraft.
It’s essentially the animal-world equivalent of lard, but typically firmer at room temperature and higher in saturated fat.
🧈 Uses for Tallow:
- Cooking: Great for frying, sautéing, or baking — has a high smoke point and a rich flavor
- Skincare: Packed with fat-soluble vitamins A, D, E, and K — mimics skin’s natural oils
- Soapmaking: Creates a hard, long-lasting bar with rich, creamy lather
- Candles: Burns clean and slow — historically used before wax became common
- Preservation: Used in traditional confit and pemmican recipes
🧪 Why Tallow Is Making a Comeback
- It’s natural, local, and zero-waste
- Contains no seed oils or synthetic additives
- Nourishing to skin and bioavailable (your body recognizes and uses it well)
- Homesteader-friendly: You can source it locally and render it yourself
🛒 Where to Get Tallow
✅ 1. Local Butcher or Farmer
Ask for beef suet (or kidney fat) — often sold cheaply or even given away. You’ll need to render it at home, which is simple and rewarding.
✅ 2. Farmers Markets or Local Meat Shares
Some vendors now sell pre-rendered tallow in jars, especially if they raise grass-fed cattle. Ask if it’s food-grade or cosmetic-grade, depending on your needs.
✅ 3. Online Sources (Pre-Rendered or Raw Suet)
- US Wellness Meats – Grass-fed tallow
- Azure Standard – Organic and clean animal fats
- Etsy – Small-batch rendered tallow from homesteaders
- Amazon – Shelf-stable options (check for pure, unbleached, grass-fed versions)
🥄 How to Render Tallow at Home (Quick Overview)
- Chop or grind the suet into small pieces
- Heat slowly in a heavy pot or slow cooker (low and slow!)
- Stir occasionally as fat melts; strain out cracklings
- Pour through cheesecloth into jars
- Let cool and store in the fridge, freezer, or cool pantry
🧴 Tallow in Skincare: Why It Works
Tallow closely matches the natural oils in human skin, which makes it non-irritating, deeply moisturizing, and nutrient-rich. Many homesteaders now use it in:
- Whipped body butters
- Lip balms
- Salves for cracked hands or feet
- Baby care and eczema creams
Cluck Kent: The Boot That Brought Trouble

It was a quiet morning in the coopyard. The chicks were practicing their ninja jumps, the hens were gossiping near the compost pile, and Cluck Kent—our ever-watchful feathered reporter—was pecking for the truth as usual.
That’s when the boot appeared.
Not just any boot.
A visitor's boot.
Unwashed. Unrinsed. And full of who-knows-what from who-knows-where.
Cluck Kent tilted his comb, gave it a side-eye, and watched as the well-meaning guest stepped into the run with a cheerful, “Hello, chickens!”
The hens froze.
The roo flared.
A cold breeze of potential pathogen panic blew through the yard.
🚨 What Cluck Found:
Turns out, the visitor had just been at a local feed store—where they admired some very sniffly-looking pullets.
They meant no harm, of course. But they brought the risk of cross-contamination right into the flock.
🧼 Biosecurity Takeaway:
Cluck Kent says:
"Love your friends. Love your flock more."
🟡 Set up a boot brush or foot bath outside the run
🟡 Keep a pair of coop-only shoes or boots
🟡 Ask visitors to stay outside the fence unless properly prepped
🟡 Don’t bring home birds, bedding, or equipment without quarantine or sanitizing
Back in the yard, Cluck Kent clucked softly and strutted toward the visitor, flapping once in warning.
Message received.
The boot backed out slowly. Peace (and hygiene) was restored.
Self Heal Salve

🌿✨ DIY Self-Heal Salve for Skin Soothing and Minor Wounds
A gentle, all-purpose salve made from the healing magic of Self-Heal (Prunella vulgaris)!
Perfect for minor cuts, scrapes, burns, insect bites, dry skin, and irritation.
🛒 Ingredients:
- 1/2 cup dried Self-Heal leaves and flowers
- 1 cup olive oil (or other carrier oil like sweet almond, jojoba, or sunflower oil)
- 2 tablespoons beeswax pellets (or grated beeswax)
- Optional: 10 drops lavender essential oil (for extra calming and antibacterial support)
🛠️ How to Make It:
1. Infuse the Oil
- In a clean, dry glass jar, combine the dried Self-Heal and olive oil.
- Let it infuse naturally in a warm, sunny window for 4–6 weeks (shake gently every day or two), OR
- Use a quick method: gently warm the Self-Heal and oil in a double boiler on the stovetop over very low heat for 2–3 hours, stirring occasionally. (Do not let it fry! Just warm.)
2. Strain
- After infusion, strain the oil through cheesecloth or a fine mesh strainer to remove all plant material.
3. Make the Salve
- In a small double boiler or heatproof bowl, combine the Self-Heal infused oil with the beeswax.
- Warm gently until the beeswax melts completely.
- Optional: Stir in lavender essential oil at this stage.
4. Pour and Set
- Pour the melted mixture into small tins or glass jars.
- Let cool completely and solidify.
🖐️ How to Use It:
- Apply a thin layer directly to minor cuts, scrapes, bug bites, burns, or dry patches of skin.
- Safe for regular use!
🐝🌿 Tips:
- Store salve in a cool, dry place.
- Shelf life: 6–12 months, depending on storage and cleanliness.
- Always use clean, dry fingers or a clean tool to scoop out the salve to avoid contamination.
🌼 Why We Love It:
Self-Heal salve is gentle enough for everyday skin support but strong enough to feel like you're carrying a little bit of natural magic in your pocket. ✨
Buy on Amazon: Seeds or Survival Garden seeds or you can purchase the dried leaves.
Just a heads up!
This post may contain affiliate links, which means if you click and make a purchase, I might earn a small commission — at no extra cost to you.
It’s like tossing a few extra seeds into the garden to help keep the homestead growing! 🌻
Thank you for supporting Weekend Homesteaders — and for loving herbs, chickens, and simple living as much as we do. 💛
Cluck Kent Reports: The Great Mouse Invasion!
🦸♂️ Cluck Kent, your fearless field reporter, here with a breaking story straight from the henhouse — and folks, it’s a squeaker. 🐭
It all started when Mildred the Maran noticed something strange: her scratch grain supply was shrinking faster than usual. And not because of overenthusiastic pecking! Suspicious, she organized a stakeout with the help of Henrietta (Head of Coop Security) and yours truly, Cluck Kent. 🕵️♂️🐔
At precisely 2:17 AM, the culprit was spotted — a tiny mouse, sneaking in through a gap under the feed room door, stuffing its cheeks with stolen seeds!
At first, some of the flock thought it was harmless.
"Oh, it’s just one little mouse," clucked Penny the Polish.
"Maybe he’s just cold and hungry."
But friends, that’s where the danger begins! 🛑🐭
Mice don't just nibble a little grain — they bring big trouble with them:
- 🦠 Bacteria and parasites
- 🐛 Worm eggs and coccidia
- 🧫 Contamination of feed and water
- 🎯 Attraction of even bigger predators (hello, snakes!)
Lucky for us, Weekend Homesteaders had biosecurity measures in place, and we jumped into action!
🛡️ Cluck Kent’s Emergency Coop Response Plan:
✔️ Feed stored in sealed metal bins — no midnight snack raids for this mouse!
✔️ Coop cracks sealed and holes patched up tight.
✔️ Feeders lifted off the ground at night to discourage visitors.
✔️ Daily coop checks for any signs of pests — because an ounce of prevention is worth a pound of cure!
✔️ Fresh water refilled and cleaned daily — no mouse-contaminated sips for our peeps!
🐓 Final Thoughts from the Coop Beat:
Biosecurity isn’t just about keeping germs off your boots — it’s about protecting your flock from every tiny invader, feathered, furred, or otherwise. 🐾
One little mouse can cause one big headache if you’re not paying attention.
So button up those feed bins, fix those cracks, and stay one step ahead of the squeaky intruders!
Until the next breaking news from the coop,
— Cluck Kent
Defender of the Flock • Watchdog of the Roost • Mouse Patrol Commander 🦸♂️🐔
Hen Saddles: Feather Protection with a Purpose

If you’ve ever glanced into your coop during spring and spotted a hen with a bare back or missing wing feathers, chances are she’s dealing with a little too much “attention” from the resident rooster. It’s a common issue during breeding season—but one that can be managed naturally, gently, and even fashionably, with a handy little item called a hen saddle.
🪶 What Is a Hen Saddle?
Despite the name, a hen saddle has nothing to do with riding chickens. It’s a small fabric apron that fits over a hen’s back and wings, protecting her feathers and skin from damage caused by overbreeding, mounting, or pecking.
Also known as a chicken apron, it attaches around the wings with simple elastic loops or Velcro tabs, and can be made in all sorts of materials—from sturdy canvas to cute prints on cotton.
🩹 Why Use a Hen Saddle?
Hen saddles offer protection and healing time—especially for hens dealing with:
- Bare backs from frequent rooster mounting
- Scratches or wounds near the wings or tail area
- Feather loss during molt (when regrowth makes skin extra sensitive)
- Pecking from other hens targeting bald patches
Feathers act as natural armor—without them, your hen is exposed to cold, sunburn, and injury. A saddle acts as a safe barrier while she heals and regrows.
🧵 DIY or Buy: Your Saddle Options
Want to make your own?
It’s surprisingly simple! All you need is:
- Sturdy cotton, canvas, or flannel (avoid synthetics that trap heat)
- Elastic or soft bias tape for wing loops
- Scissors and a sewing machine (or a strong hand-stitch)
- Basic pattern (we can include one in the printable section!)
You can also find pre-made saddles online in all styles—from practical neutrals to fun floral patterns. Look for ones that are:
- Breathable and washable
- Snug but not tight around the wings
- Designed to sit flat across the back without slipping
✨ Tips for Using Hen Saddles Successfully
- Watch for chafing the first day—adjust if needed
- Check for mites or wounds underneath the saddle weekly
- Don’t leave them on indefinitely—remove once feathers regrow
- Introduce them gradually if your hens aren’t used to wearing anything
Some hens strut like runway models on day one. Others might do a dramatic feather flop for a few minutes—but don’t worry, they adjust quickly.
🌿 Gentle Flock Care with Big Benefits
Hen saddles are a small solution with big impact. They let your girls heal without stress, avoid injury, and maintain dignity in the face of an overly enthusiastic roo.
And let’s be honest—there’s something downright charming about a confident hen in a floral apron.
We use these saddles (from Amazon) on our hens.
(NOTE: 🐥 This is an affiliate link—if you cluck through and make a purchase, we may earn a small commission (at no extra cost to you). It helps keep the coop running and the treat bin full!)
Nest Box Drama & Disease: How One Box Became a Biosecurity Breach
Most days in the coop begin with a bit of cackling, some early morning scratching, and a race to the worm pile. But this week, the big story isn’t what’s happening outside—it's what’s festering inside Nest Box #3.
You’ve seen it: five pristine nest boxes, but somehow every hen in the flock is squabbling over the same one. To the untrained eye, it’s just a quirky chicken habit. But to a seasoned flock journalist (and biosecurity sleuth) like myself? It’s a ticking time-bomb of coop health hazards.
Let’s scratch deeper.
🧪 Biosecurity Risk #1: High-Traffic Nest Boxes Spread Pathogens
When the majority of the flock insists on using the same nest box—over and over again—it becomes a concentrated zone of droppings, dander, broken shell fragments, and moisture. All of which create a perfect environment for bacteria like E. coli, Salmonella, and Clostridium perfringens.
🧼 Cluck’s Tip: Disinfect nest boxes regularly using a poultry-safe solution, especially high-use ones. Consider rotating the “popular” box out of service for a deep clean every couple of weeks.
🦠 Biosecurity Risk #2: Parasite Pressure Ramps Up
External parasites like red mites and poultry lice are clever little creeps. They’ll settle into high-traffic boxes and hide in cracks, nesting materials, or underneath perches nearby. If the entire flock shares one box, you’re giving these freeloaders an all-access pass.
🐛 Cluck’s Tip: Dust nest boxes with diatomaceous earth or wood ash, and swap nesting materials weekly. Look under wings and around vents for early mite activity.
🩸 Biosecurity Risk #3: Pecking Injuries Invite Infection
Tensions rise when space is limited. In Coop #7, I witnessed a tense face-off between three hens, all trying to climb into Box #3 at once. The result? A small pecking injury—and an open door to staph infections, coccidiosis, and even cannibalistic behavior if left untreated.
🧴 Cluck’s Tip: Watch for increased aggression or blood on feathers. Treat peck wounds promptly and isolate if needed. No peck is too small to ignore.
😰 Biosecurity Risk #4: Stress Lowers Immune Defenses
Let’s not forget the invisible cost: chronic coop stress. When hens feel pressured, pushed out, or targeted, their immune systems take a hit. That opens the door for common respiratory illnesses like infectious bronchitis or mycoplasma to spread fast.
🌿 Cluck’s Tip: Spread the love. Make all nest boxes equally appealing—same bedding, soft lighting, and even soothing herbs like chamomile or lavender.
💡 Cluck’s Closing Thought:
What seems like simple hen drama is often the early warning signal of a biosecurity lapse. Don’t wait for feather loss, funky smells, or a surprise vet bill. Small changes—like balancing nest box traffic—can make a big difference in your flock’s health.
So next time your hens are all clucking over one nest box, remember:
Where chickens crowd, pathogens thrive.
Keep it clean, keep it calm, and keep rotating those boxes.
🪶 Reporting from the perch,
Cluck Kent, your eyes and beak on coop biosecurity.
For our Little Chick Inn University members, check out the newest guide "Recipes & Blends" for the Spring Calm Herbal Nest Blend in the guide ... and if you aren't a member we invite you to check it out HERE.
This blend is a fragrant herbal blend that not only soothes your hens, but it also helps deter mites, flies, and bacteria. All you need to do is sprinkle a handful into each nest box after cleaning.
Behind the Wire with the New Flock on the Block
🕵️♂️ Cluck Kent: The Quarantine Chronicles
Something’s clucking in the holding pen, and Cluck Kent is on the case.
This week, whispers echoed through the coop—word had spread that three new pullets were moving in.
“Refugees from a farm upstate,” muttered Goldie, who hasn’t trusted an outsider since the 2021 molt incident. But what raised feathers wasn’t who the newcomers were—it was where they weren’t.
“They were let right in,” said a wide-eyed Australorp. “No buffer zone. No health checks. Not even a courtesy dust bath.”
That’s when Cluck Kent knew: it was time to talk quarantine.
Why Quarantine Matters (According to Science and Chickens)
Adding new birds to your flock without a quarantine period is like inviting a stranger to dinner and letting them cough into your soup. You wouldn’t do it—so why do it to your flock?
Quarantine isn’t punishment—it’s protection.
New birds, no matter how healthy they look, can carry:
- Respiratory illnesses (Mycoplasma, Infectious Bronchitis)
- External parasites (mites, lice)
- Internal parasites (worms galore)
- Viruses like Marek’s that can lurk quietly for weeks
Cluck Kent’s Official 30-Day Quarantine Checklist:
Location, Location, Location
Set up a secure pen at least 30 feet away from your main coop. No shared air space if you can help it.
Separate Gear
Use different feeders, waterers, gloves, and boots for your quarantine area. Cross-contamination is sneaky.
Observe Daily
Keep a quarantine log. Watch for sneezing, runny eyes, odd droppings, or sluggish behavior. (Bonus: it builds trust with the new birds.)
Prevent Parasites
Do a preventive mite/lice treatment during this time and run a fecal check if possible.
Slow Integration
After 30 days symptom-free, introduce the newcomers slowly, with a visual barrier for the first week. Think meet-and-cluck, not full-on mixer.
🐔 “Quarantine is love with a fence around it,” Cluck Kent reports. “Protecting the flock means playing it smart—not playing chicken with disease.”
🪶 Bonus Scratch: Introducing New Birds Without Coop Drama
Your Post-Quarantine Integration Plan
You've made it through the full 30-day quarantine—well done! But before you open the gates and let your new gals free-range with the old crew, follow this step-by-step guide to keep the pecking order from becoming a pecking disaster.
🧱 Step 1: Look, Don’t Touch
Place the new flock in a secure enclosure next to your existing coop/run. They should see, hear, and smell each other—but not have contact—for at least 5–7 days.
🐓 "We call this the Chicken Tinder phase—just swiping eyes at each other,” says Coop Counselor Ruby the Sussex.
🍽️ Step 2: Distract with Snacks
Introduce high-value treats (think watermelon, cabbage heads, or scrambled eggs) during these side-by-side sessions. Everyone focuses on the food, not the new faces.
💤 Step 3: First Sleepover
After a week of peaceful visual contact, move the new hens into the coop at night. Chickens are calmer in the dark and less likely to fight when they wake up together.
⏳ Step 4: Supervised Free Ranging
Let the whole flock free-range in a larger space together under supervision. Space diffuses tension, and you'll be able to intervene if things get spicy.
🛑 Watch for Bullying
A little pecking is normal—establishing hierarchy is a chicken pastime—but if blood is drawn or one bird is consistently chased away from food or water, you may need to separate and retry in a few days.
🧠 Cluck Kent’s Final Word:
“Slow and steady wins the pecking order. Patience now means fewer feathers flying later.”
Why the Little Chick Inn University?

As the backyard chicken movement continues to grow, more and more people are bringing chicks home—some for the first time ever. It’s exciting to see so many new chick tenders joining the community, but with that excitement comes a big responsibility: giving these little lives the best possible start.
With the boom in backyard flocks, advice is everywhere—especially in Facebook groups and local forums. The photos and comments in this blog post are pulled directly from real posts on popular and local chicken pages. While most folks truly mean well, many of the tips being shared are misinformed, inhumane, or just not the best practice. Unfortunately, chicks are especially vulnerable to these missteps.
Raising chickens isn’t one-size-fits-all, but at Little Chick Inn, we believe the foundation should always be built on sustainable, compassionate care. Our chickens are more than just egg producers—they’re a vital part of our homestead, and they bring us daily joy, peace, and laughter.
We created Little Chick Inn University as a personalized resource for people purchasing our chicks—and for anyone who wants to raise their birds with intention and heart. Whether you're brand new or just looking to improve your approach, we’re here to help you navigate this rewarding journey with the knowledge, confidence, and care it truly deserves.
Let’s raise happy, healthy chicks—together.
Want to know more? Visit our Little Chick Inn University HERE.

Why Chicks Shouldn’t Be Placed on Their Backs
In the image, a baby chick is shown lying on its back in someone's hands, feet up and belly exposed. While it may seem cute or harmless, this is actually a dangerous position for chicks—and for all chickens.
Chickens have delicate respiratory systems that can be compromised when they’re placed on their backs. This position can cause stress, disorientation, and even difficulty breathing. In young chicks especially, it can interfere with normal development or lead to injury if they panic and struggle to flip over.
Always handle chicks gently and keep them upright to ensure their comfort, safety, and proper health. What looks innocent can actually be quite risky for these fragile little creatures.
(Below) Proper biosecurity might have prevented this.


Above: Do your research prior to hatching to prevent some common but unnecessary mistakes.
I am at a loss on this post. Someone asked for help with a chick that hatched with issues. The suggestions from the group are horrifying.
See above right for just a few.


This is a somewhat common problem (especially when chicks are incubated under less than favorable humidity conditions - BUT not always) - this is a relatively easy fix in many circumstances as long as it is discovered and corrected as soon as possible.
Learn more in the Little Chick Inn University.
Egg Weight During Incubation
🥚 What Is Egg Weight Loss During Incubation?
As an egg incubates, it naturally loses water through its porous shell. This water loss is essential — it allows the air cell to grow, which the chick needs for breathing just before hatching.
The egg’s total weight will gradually decrease over the 21-day incubation period.
📉 How Much Weight Should an Egg Lose?
A fertilized egg should lose approximately 12–14% of its original weight by day 18 (lockdown). Too little or too much weight loss can indicate humidity issues:
- Too little weight loss = humidity too high → small air cell → chick may drown
- Too much weight loss = humidity too low → large air cell → chick may be weak or stuck
🧪 How to Monitor Egg Weight Loss
- Weigh eggs before setting (Day 0)
- Weigh weekly (Day 7, 14, and 18) — or more often if needed
- Calculate percentage loss:
- Weight loss % = ((Start weight – Current weight) ÷ Start weight) × 100
- Adjust humidity based on results
💡 Quick Tips:
- Use a precision digital scale for best accuracy
- Track each egg or an average of several for batch hatching
Candle to monitor air cell size as a visual reference